
Add structured data annotations to Eleventy blog
Reading time: 4 min
Last updated
_,.-'~'-.,__,.-'~'-.,__,.-'~'-.,__,.-'~'-.,__,.-'~'-.,_
<TLDR> Add structured data (JSON-LD) annotations to enable rich snippets in Google search results. Github repo. </TLDR>
What is structured data?
It's a specially formatted code used to describe properties of a page it's added to. Popular formats are RDF, microdata and JSON-LD. Latter is easier to integrate on a page because it's a plain <script> tag with JSON in it. The other 2 formats would require changing the html of content blocks to describe that content in a machine-readable way, which is not really convenient.
You may want to add JSON-LD annotations to your website to make it easier for crawlers (Google, Bing) to understand page content.
How is it useful? Google will be able to enhance search results by using bits found in the referenced structured data. Ever wondered where do answer snippets come from in search results? That's a special Q&A structured data type. For a full list of supported structured data types (and how corresponding enhanced search results look like) check this page.
What is Eleventy?
Eleventy is a minimal, fast and easy to use static site generator. Unlike many other SSGs, it doesn't add any JavaScript to the generated pages (unless you decide add it yourself). Which means built version loads very quickly! It's great for when you don't need the power of React and friends, like in most blogs and documentation sites.
How to add structured data in Eleventy #
In this post I'll show how to add 2 structured data types to an Eleventy blog: BlogPosting (represents actual post pages) and WebPage (for all other pages).
You could include the JSON manually in your 11ty templates but luckily there's a plugin which simplifies this task: eleventy-plugin-schema.
Plugin installation and configuration should be straightforward but it took me some time to figure out how to integrate it with computed data, hence this post.
I'll use eleventy-base-blog as a starting point.
Clone the repo.
Add structured data plugin and install all dependencies:
npm install --save-dev @quasibit/eleventy-plugin-schemaStart a development server:
npm run serveYou should see a basic blog at http://localhost:8080/
Enable the plugin in config file:
// .eleventy.js

const markdownIt = require("markdown-it");
const markdownItAnchor = require("markdown-it-anchor");
const schema = require("@quasibit/eleventy-plugin-schema");

module.exports = function (eleventyConfig) {
eleventyConfig.addPlugin(pluginRss);
eleventyConfig.addPlugin(pluginSyntaxHighlight);
eleventyConfig.addPlugin(pluginNavigation);
eleventyConfig.addPlugin(schema);
Add a date filter to convert date objects to ISO 8601 format. We'll use it at a later step.
// .eleventy.js

eleventyConfig.addFilter('htmlDateString', (dateObj) => {
  return DateTime.fromJSDate(dateObj, { zone: 'utc' }).toFormat('yyyy-LL-dd')
})

eleventyConfig.addFilter('iso8601', (dateObj) => {
  return DateTime.fromJSDate(dateObj, { zone: 'utc' }).toISO()
})
We want to add BlogPosting structured data to posts pages and WebPage to all other pages. BlogPosting is really an extension of WebPage. Here's a DRY way to implement it I came up with.
Add shared structured data properties to _includes/layouts/base.njk - layout used by all website pages.
Add blog post specific properties to _includes/layouts/post.njk - layout used by post pages, will be merged with base layout.
Add blog post specific properties:
// _includes/layouts/post.njk

---
layout: layouts/base.njk
templateClass: tmpl-post
type: post
eleventyComputed:
  meta:
    author:
      name: "{{ metadata.author.name }}"
    published: "{{ date | iso8601 }}"
    modified: "{% if updateDate %}{{ updateDate | iso8601 }}{% endif %}"
---
<h1>{{ title }}</h1>
Add shared page properties:
// _includes/layouts/base.njk

---
type: page
meta:
  language: en-US
eleventyComputed:
  meta:
    site:
      name: "{{ metadata.title }}"
      description: "{{ metadata.description }}"
      url: "{{ metadata.url }}"
    title: "{{ title or metadata.title }}"
    description: "{{ description or metadata.description }}"
    image:
      src: "{% if image %}{{ metadata.url }}{{ image }}{% endif %}"
---
<!doctype html>
<html lang="en">
Finally add a placeholder where resulting JSON-LD will be rendered:
// _includes/layouts/base.njk

<title>{{ title or metadata.title }}</title>
<meta name="description" content="{{ description or metadata.description }}">
{% jsonLdScript meta, type, tags %}
<link rel="stylesheet" href="{{ '/css/index.css' | url }}">
Now check the page source in a browser, you should see the structured data:
<meta
name="description"
content="I am writing about my experiences as a naval navel-gazer."
/>
<script type="application/ld+json">
{
"@context": "https://schema.org",
"@graph": [
{
"@type": "WebSite",
"@id": "https://example.com/#website",
"url": "https://example.com/",
"name": "Your Blog Name",
"description": "I am writing about my experiences as a naval navel-gazer.",
"inLanguage": "en-US"
},
{
"@type": "WebPage",
"mainEntityOfPage": {
"@type": "WebPage"
},
"isPartOf": {
"@id": "https://example.com/#website"
},
"headline": "Your Blog Name",
"description": "I am writing about my experiences as a naval navel-gazer.",
"image": "",
"inLanguage": "en-US",
"publisher": {
"@type": "Organization",
"name": "Your Blog Name",
"url": "https://example.com/"
}
}
]
}
</script>
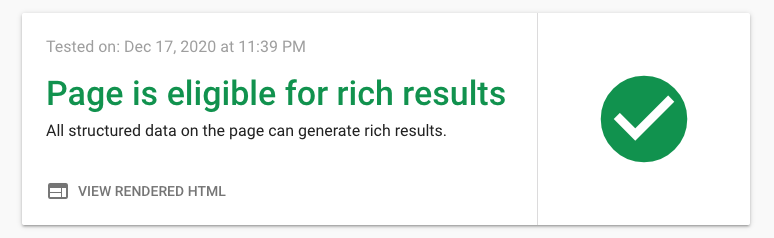
<link rel="stylesheet" href="/css/index.css" />After deploy, validate your pages with Rich Results Test tool.
Full code is in Github repo.
If you like this type of content you can follow me on Twitter for the latest updates.
_,.-'~'-.,__,.-'~'-.,__,.-'~'-.,__,.-'~'-.,__,.-'~'-.,_
Next: Ignore Azure Functions application settings drift in Terraform
Previous: Serverless GraphQL with Azure Functions and PostgreSQL