
Deploy AWS Lambda to VPC with Terraform
Reading time: 11 min
Last updated
_,.-'~'-.,__,.-'~'-.,__,.-'~'-.,__,.-'~'-.,__,.-'~'-.,_
You may need to put your Lambda function into a VPC (Virtual Private Cloud) for the function to have access to the resources in the private network. Common use case is accessing an RDS instance not reachable from the Internet.
Running Lambda in a VPC has some downsides:
- Networking limitations at scale. There are soft and hard limits to the number of ENIs (virtual network cards) shared by compute instances that you can have.
- Much more complex setup compared to the standard "managed" Lambda configuration.
Check this article by Yan Cui for more details. There used to be an issue of slower cold starts for Lambdas connected to VPCs, but it's not the case anymore.
Considering the large number of AWS resources one needs to create and configre to have Lambda in a private subnet, getting it right may be challenging, especially if you're not a network engineer. It surely took me some time to figure out.
Many tutorials on the Internet describe the process using AWS Console to provision resources. It may be sufficient for quick experiments but for something more long-term you should probably invest some time in defining resources with infrastructure-as-code.
If Terraform is what you use, this post may be useful to you.
We'll go from a basic, non-VPC Lambda Terraform module and will upgrade it to run the function in a VPC with oubound (Internet) connectivity, one step at a time.
Prerequisites #
To follow along you will need:
- Terraform 0.14
- AWS Account and AWS CLI
I'll be using Docker below to run both. If you don't have the tools installed locally, you're welcome to do the same.
Note some AWS resources incur costs, most notably NAT Gateway will set you back ~$32/month.
Ground zero #
Let's create a standard Lambda function with Terraform and make sure it works first. The function will run a little snippet of Node.js code. Since we want to test the connectivity to the internet, the function will fetch some data from a 3rd party API. For added credibility, we'll integrate with an API providing random Chuck Norris facts (so old but still so good!).
When Chuck Norris enters a room, he doesn't turn the lights on, he turns the dark off.
Lambda code #
const https = require('https')

exports.handler = async function () {
  const res = await fetch('https://api.chucknorris.io/jokes/random')
  const randomFact = JSON.parse(res).value

  return randomFact
}

async function fetch(url) {
  return new Promise((resolve, reject) => {
    const request = https.get(url, { timeout: 1000 }, (res) => {
      if (res.statusCode < 200 || res.statusCode > 299) {
        return reject(new Error(`HTTP status code ${res.statusCode}`))
      }

      const body = []
      res.on('data', (chunk) => body.push(chunk))
      res.on('end', () => {
        const resString = Buffer.concat(body).toString()
        resolve(resString)
      })
    })

    request.on('error', (err) => reject(err))
    request.on('timeout', (err) => {
      console.log('timed out', err)
      reject(err)
    })
  })
}
The code is straightforward - it fetches a random fact from the API and returns it to the caller.
To make it simple, I didn't want to add any dependencies and used native https Node module for making requests.
Lambda Terraform module #
We start with couple variables: project will be used as a prefix in resource names and region is where the resources will be deployed.
# terraform/variables.tf

variable "project" {
  type        = string
  description = "Project name"
}

variable "region" {
  type        = string
  description = "Azure region"
  default     = "us-east-1"
}
If you ever deployed Lambda with Terraform, there shouldn't be any surprises. The minimum set of resources includes an IAM role with managed AWSLambdaBasicExecutionRole policy attached, the function itself, and the archive with the code to be uploaded to Lambda. Every time you make a change in the code, the hash of the ZIP file will change and Lambda code will be updated by Terraform. In the real world, you'll probably want to configure a CI/CD pipeline to push code updates to Lambda.
# terraform/main.tf

provider "aws" {
  profile = "default"
  region  = var.region
}

provider "archive" {}

data "archive_file" "lambda" {
  type        = "zip"
  source_dir  = "../lambda"
  output_path = "lambda.zip"
}

data "aws_iam_policy_document" "AWSLambdaTrustPolicy" {
  version = "2012-10-17"
  statement {
    actions = ["sts:AssumeRole"]
    effect  = "Allow"
    principals {
      type        = "Service"
      identifiers = ["lambda.amazonaws.com"]
    }
  }
}

resource "aws_iam_role" "iam_role" {
  assume_role_policy = data.aws_iam_policy_document.AWSLambdaTrustPolicy.json
  name               = "${var.project}-iam-role-lambda-trigger"
}

resource "aws_iam_role_policy_attachment" "iam_role_policy_attachment_lambda_basic_execution" {
  role       = aws_iam_role.iam_role.name
  policy_arn = "arn:aws:iam::aws:policy/service-role/AWSLambdaBasicExecutionRole"
}

resource "aws_lambda_function" "lambda_function" {
  code_signing_config_arn = ""
  description             = ""
  filename                = data.archive_file.lambda.output_path
  function_name           = "${var.project}-lambda-function"
  role                    = aws_iam_role.iam_role.arn
  handler                 = "index.handler"
  runtime                 = "nodejs14.x"
  source_code_hash        = filebase64sha256(data.archive_file.lambda.output_path)
}
Deploy ground zero to AWS #
Start a dev Docker container based on the AWS CLI image:
docker run --rm -it -v $(pwd):/var/app -w /var/app --entrypoint bash amazon/aws-cliConfigure AWS credentials (access key ID, secret access key) that will be used by Terraform below:
aws configureInstall Terraform:
yum install -y yum-utils

yum-config-manager --add-repo https://rpm.releases.hashicorp.com/AmazonLinux/hashicorp.repo

yum -y install terraform
Deploy the module:
cd terraform

terraform init

terraform apply
Make sure Lambda works:
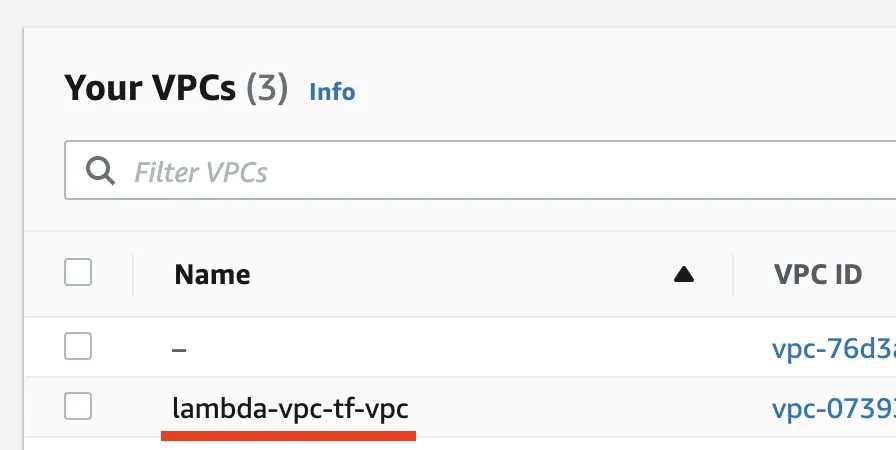
aws lambda invoke --function-name lambda-vpc-tf-lambda-function out.txt
{
    "StatusCode": 200,
    "ExecutedVersion": "$LATEST"
}
cat out.txt
"If you spell Chuck Norris in Scrabble, you win. Forever."VPC resources #
Be prepared, there will be many resources. Still Terraform helps a lot, if you were to check equivalent config in Cloudformation, it's more verbose!
On a high level, we will create a new VPC with 2 subnets. One is public (has a route to the Internet) and the other is private (does not have direct route out). The way to connect Lambda to VPC is by associating it with at least one private subnet. That would give the function access to the resources in the VPC. But it won't have oubound connectivity yet. For that, a NAT component is required.
Create VPC #
Every AWS account has a default VPC pre-created. You can use that, but let's see how to create one.
The only required argument is the address space of the virtual network (in CIDR format).
# terraform/variables.tf

...

variable "vpc_cidr_block" {
  type        = string
  description = "VPC CIDR"
}
I'll go with vpc_cidr_block = "10.0.0.0/16" spanning 65,536 IP addresses.
# terraform/main.tf

...

resource "aws_vpc" "vpc" {
  cidr_block = var.vpc_cidr_block
  tags = {
    Name = "${var.project}-vpc"
  }
}
Quick note on the Name tag. More often than not, there's no "name" property on the VPC Terraform resources themselves, but if you add a Name tag it serves the same purpose. The value will be used in the AWS Console in the Name column.
Create public subnet #
Besides the subnet itself, we'll create a number of supporting resources too.
Public subnet
# terraform/variables.tf

...

variable "subnet_public_cidr_block" {
  type        = string
  description = "Public subnet CIDR"
}
# terraform/terraform.tfvars
...
subnet_public_cidr_block = "10.0.0.0/21"# terraform/main.tf
...
resource "aws_subnet" "subnet_public" {
vpc_id = aws_vpc.vpc.id
cidr_block = var.subnet_public_cidr_block
map_public_ip_on_launch = true
tags = {
Name = "${var.project}-subnet-public"
}
}Internet Gateway
Each VPC can be associated with one (and only one) Internet Gateway. It is a managed highly available service from AWS which provides connectivity for public IP-enabled instances in the VPC to the Internet.
# terraform/main.tf

...

resource "aws_internet_gateway" "internet_gateway" {
  vpc_id = aws_vpc.vpc.id

  tags = {
    Name = "${var.project}-internet-gateway"
  }
}
Public route table
What makes a public subnet public is a route to the Internet Gateway. Let's do just that, create a new route table with a single route (rule) to direct network requests to the Internet Gateway. We then associate the (public) route table with the (public) subnet. There's an implicit route allowing traffic within the VPC.
# terraform/main.tf

...

resource "aws_route_table" "route_table_public" {
  vpc_id = aws_vpc.vpc.id

  route {
    cidr_block = "0.0.0.0/0"
    gateway_id = aws_internet_gateway.internet_gateway.id
  }

  tags = {
    Name = "${var.project}-route-table-public"
  }
}

resource "aws_route_table_association" "route_table_association_public" {
  subnet_id      = aws_subnet.subnet_public.id
  route_table_id = aws_route_table.route_table_public.id
}
Elastic IP and NAT Gateway
NAT Gateway is a network device that enables outbound connectivity for devices in the private network. Gateway translates requests from a private subnet to the Internet (by replacing the private "from" IP of the sender with gateway's public IP and putting it back to deliver the response to the sender). The relationship here is one to many - one NAT device serves many clients in the private subnet. NAT device must have a public IP address (Elastic IP in our case) and must be placed in the public subnet where it can reach the Internet.
Before AWS introduced NAT Gateway one could launch an EC2 instance with NAT configured. That's still a valid (and cheaper when compared to NAT Gateway) option, but you'd need to look after the instance (disk space, OS and security upgrades, etc.). NAT Gateway price varies depending on the region, cheapest being $0.045/hr as of the time of writing.
For critical workflows, AWS recommends configuring at least 2 NAT gateways placed in different availability zones to avoid single point of failure in case of AZ going down. To keep it simple, we'll create only a single gateway.
# terraform/main.tf

...

resource "aws_eip" "eip" {
  vpc        = true
  depends_on = [aws_internet_gateway.internet_gateway]
  tags = {
    Name = "${var.project}-eip"
  }
}
# terraform/main.tf
...
resource "aws_nat_gateway" "nat_gateway" {
allocation_id = aws_eip.eip.id
subnet_id = aws_subnet.subnet_public.id
tags = {
Name = "${var.project}-nat-gateway"
}
}Create private subnet #
Private subnet is what we will associate Lambda with. The address space must be large enough to accomodate all IPs that will be assigned to ENIs when Lambda scales out.
Private subnet
# terraform/variables.tf

...

variable "subnet_private_cidr_block" {
  type        = string
  description = "Private subnet CIDR"
}
# terraform/terraform.tfvars
...
subnet_private_cidr_block = "10.0.8.0/21"# terraform/main.tf
...
resource "aws_subnet" "subnet_private" {
vpc_id = aws_vpc.vpc.id
cidr_block = var.subnet_private_cidr_block
map_public_ip_on_launch = false
tags = {
Name = "${var.project}-subnet-private"
}
}Private route table
Like in the public subnet, we need a route table with a route to direct traffic from the subnet to the NAT gateway. By default, devices in subnets within a VPC can talk to each other. In our case, it's Lambda in the private subnet making calls to the NAT Gateway in the public subnet.
# terraform/main.tf

...

resource "aws_route_table" "route_table_private" {
  vpc_id = aws_vpc.vpc.id

  route {
    cidr_block     = "0.0.0.0/0"
    nat_gateway_id = aws_nat_gateway.nat_gateway.id
  }

  tags = {
    Name = "${var.project}-route-table-private"
  }
}

resource "aws_route_table_association" "route_table_association_private" {
  subnet_id      = aws_subnet.subnet_private.id
  route_table_id = aws_route_table.route_table_private.id
}
Create security resources #
In VPCs, the security controls available to you are Network Access Control Lists and Security Groups. These 2 are complementary and can be used individually as well as in combination.
NACLs are stateless (for a given connection, you need to specify both inbound and outbound rules) and are associated with subnets.
Security Groups are stateful (allowing inbound traffic to a port will automatically allow replies from that port). You associate devices (EC2 instances, Lambda) with security groups.
Whenever a VPC is created, a NACL and a security group are created implicitly. You can take over these resources with aws_default_... Terraform resources. Ingress and egress rules provided below match what's created by AWS by default.
NACL
As with default settings, it allows all traffic on the network level.
# terraform/main.tf

...

resource "aws_default_network_acl" "default_network_acl" {
  default_network_acl_id = aws_vpc.vpc.default_network_acl_id
  subnet_ids             = [aws_subnet.subnet_public.id, aws_subnet.subnet_private.id]

  ingress {
    protocol   = -1
    rule_no    = 100
    action     = "allow"
    cidr_block = "0.0.0.0/0"
    from_port  = 0
    to_port    = 0
  }

  egress {
    protocol   = -1
    rule_no    = 100
    action     = "allow"
    cidr_block = "0.0.0.0/0"
    from_port  = 0
    to_port    = 0
  }

  tags = {
    Name = "${var.project}-default-network-acl"
  }
}
Security Group
As with the default settings, it allows all outbound traffic and allows inbound traffic originating from the same VPC.
# terraform/main.tf

...

resource "aws_default_security_group" "default_security_group" {
  vpc_id = aws_vpc.vpc.id

  ingress {
    protocol  = -1
    self      = true
    from_port = 0
    to_port   = 0
  }

  egress {
    from_port   = 0
    to_port     = 0
    protocol    = "-1"
    cidr_blocks = ["0.0.0.0/0"]
    # cidr_blocks = ["127.0.0.1/32"]
  }

  tags = {
    Name = "${var.project}-default-security-group"
  }
}
Add Lambda to the VPC #
Now that we have the VPC set up we can associate our existing Lambda function with the network. For that, we need to provide the VPC subnet and security group. AWS recommends adding Lambda to at least 2 subnets for high availability. Combined with the recommendation to have multiple NAT gateways, you will need to create additional route tables too, to associate each private subnet with its dedicated NAT Gateway.
VPC access policy
Since Lambda service will need to create ENIs (virtual network cards) in the private subnet, it needs additional IAM permissions. Those can be granted via AWSLambdaVPCAccessExecutionRole managed policy.
If the permission is missing, you will get the error during deployment: Error: error modifying Lambda Function (lambda-vpc-tf-lambda-function) configuration : InvalidParameterValueException: The provided execution role does not have permissions to call CreateNetworkInterface on EC2.
# terraform/main.tf

...

resource "aws_iam_role_policy_attachment" "iam_role_policy_attachment_lambda_vpc_access_execution" {
  role       = aws_iam_role.iam_role.name
  policy_arn = "arn:aws:iam::aws:policy/service-role/AWSLambdaVPCAccessExecutionRole"
}
Lambda function VPC config
We configure Lambda to connect it to the private subnet. Also it will be subject to the Security Group rules.
# terraform/main.tf

...

resource "aws_lambda_function" "lambda_function" {
  ...

  vpc_config {
    subnet_ids         = [aws_subnet.subnet_private.id]
    security_group_ids = [aws_default_security_group.default_security_group.id]
  }
}
To confirm everything is configured correctly, invoke the function again. If you're getting "timed out" error in Cloudwatch, likely something is wrong with the NAT Gateway configuration as the function cannot reach the API.
References #
- https://registry.terraform.io/providers/hashicorp/aws/latest/docs/resources/lambda_function
- https://github.com/maximivanov/deploy-aws-lambda-to-vpc-with-terraform
- https://lumigo.io/aws-lambda-deployment/lambda-vpc/
- https://mikhail.io/serverless/coldstarts/aws/
- https://stackoverflow.com/a/22212017/2579733
- https://api.chucknorris.io/
... #
VPC configuration may be tricky if you're not a seasoned network professional. As a final note, I recommend this Stack Overflow answer by Michael "sqlbot" which explains private/public subnet concepts really well.
If you like this type of content you can follow me on Twitter for the latest updates.
_,.-'~'-.,__,.-'~'-.,__,.-'~'-.,__,.-'~'-.,__,.-'~'-.,_
Next: How a compromised NPM package can steal your secrets (POC + prevention)
Previous: AWS Cognito: Amplify vs amazon-cognito-identity-js vs AWS SDK